Monday, 25 April 2011

Replace LED Bulb in a Compaq Presario F500

type="html">

The LED screen in your Compaq Presario laptop is powered by a bulb that is located directly behind the screen. If your screen is dark or is generally not functioning properly, it is likely the result of a blown backlight bulb. The good news is that you don't need to pay a computer tech to fix the problem for you, as you can replace the backlight yourself.

1). Power off your F500 and unplug the AC adapter power cable.

2). Slide the rectangular battery out of its compartment located on the underside of the computer.

3). Open the display screen and use your Phillips screwdriver to remove all screws on the sides and corners of the plastic frame that surrounds the display screen.
4). Use your fingers to pry the frame off of the screen at the sides and corners.

5). Locate the rectangular inverter board mounted directly below the screen. There will be two wires plugged into ports on either side of the board. The wire on the right side of the board is the backlight bulb wire. Unplug it.

6). Tilt the screen forward to expose the backlight bulb secured to the rear of the LCD with tape. Remove the tape covering the backlight bulb and remove the bulb.

7). Fit a new bulb in the old one's place and replace the tape.

8). Plug the bulb cable into the port on the inverter board and replace the screen frame and screws.

Membrane Keypads Tutorial

type="html">


 Unlike traditional keypads with moving keys, membrane keypads are pressure sensitive, with key outlines or symbols printed on a flat waterproof surface. A wide variety of products employ membrane keypads, such as remote controls and microwave ovens, printers and switches.

Industrial Uses
Membrane keypads are a part of many consumer products, but you can also find them in industries where hygiene is important or where systems are exposed to extreme environments. For example, medical technology, the automotive industry and the disposal and recycling industry use membrane keypads.
Membrane Layers
Membrane keypads consist of four layers. The contact elements for membrane keyboards are embedded between three layers of membrane beneath the waterproof outer layer. The bottom layer is printed with a conductive switch trace for each key. The middle layer, or spacer, has holes exposing each underlying switch. The top layer is a conductive layer with an optional array of rubber domes.

Keypad Action
Pressing keys on the outer layer of the membrane keypad completes a circuit. The keys force the conductive layer through the middle spacer so they contact the switch traces on the bottom layer. If rubber domes exist on the top membrane layer, they force pressed keys back into position when released.

Upgrade Power Supplies in Computers

type="html">

 
Power supplies are needed because your computer needs different voltages than what comes straight from the outlet. Disconnecting and replacing a power supply is simple because it's just piece of hardware.

1). Shut down your computer and unplug the cable from the wall and the back of your computer. Open the computer case. This may involve unscrewing the access door from the back of the computer, pushing a lever or just sliding the door off.

2). Unplug the power connectors from all of the drives and the motherboard. The connectors can be removed by either pulling them straight out or by pushing a release button first and then pulling the connector out. Some motherboards have two sockets where the power supply is plugged in.
3). Unscrew the power supply from the back of the case. The power supply is usually held in place by four Phillips screws. Pull the power supply out from inside the case. There is often a small shelf the power supply sits on. Hold on to the power supply as you unscrew it to make sure it doesn't fall.

4). Slide the new power supply into place. Screw it into the case from the back of the computer.

5). Connect all of the drives back to the power supply with the appropriate connectors. Connect the correct connectors to your motherboard as well. Make sure you plug the connectors back in the same direction they were plugged in as there is only one way in which they fit properly.

6). Close the computer case and plug the computer power cable into the power supply and the wall outlet.

Enable Power Management in the BIOS

type="html">

 
The BIOS controls the basic functioning of the various input/output devices connected or integrated within the system. Without the BIOS, the computer's main processor would not have the ability to communicate with or operate other pertinent components of the system. Enabling and adjusting the power management settings within the BIOS reduces power consumption and gives you control regarding how the computer operates when not in use.

1). Turn the computer on and enter the BIOS menu. Depending upon your particular computer or BIOS version, you have to press a certain key to gain access to the BIOS menu. Pay close attention to the display screen during the startup process, to determine the correct key. Alternately, consult your user manual or see Resources for a link of key combinations by manufacturer.

2). Enter the system password, if applicable.
3). Navigate to the appropriate power management options, using your keyboard. In most cases, highlighting a specific power management item produces an expanded explanation of the option.

4). Enable or adjust the appropriate power-management options, according to your needs. Save the settings and exit the BIOS menu. After saving and exiting the BIOS menu, the computer restarts.

What Does a Uninterruptible Power Supply Do

type="html">


An uninterruptible power supplies (UPS) serves as essential electrical backup to ensure that critical equipment stays running during power failures. When power is lost, the UPS automatically switches to its battery. Any electrical or electronic devices plugged into the UPS continue to work without a problem.

Voltage Monitor
Electronic circuits in the UPS continually monitor the power line's voltage. Normally, the alternating current (AC) power runs at 110 to 120 volts. If the voltage sags more than a few percent, for even a few thousandths of a second, the UPS switches over to battery power. The switching action is so fast that even sensitive equipment never registers a problem. When the AC line voltage returns to normal, the UPS switches the battery off, providing power straight from the outlet. The UPS uses the battery only when needed.
DC to AC Conversion
The electric power available at a standard outlet is alternating current, or AC. This electricity reverses direction at 60 cycles per second. Any appliance plugged into an outlet needs AC at the correct voltage. The UPS's battery produces direct current (DC) at a much lower voltage. An electronic circuit called an inverter converts the DC battery power to 120-volt AC that appliances can use.

Alarm
The UPS sounds an audible alarm when the power goes out, indicating that it's running on battery power. Depending on the size of the UPS and the devices running on it, the battery can last anywhere from 5 minutes to several hours. If you have a smaller UPS unit running a computer, for example, this gives you enough time to save your files and shut your computer down in an orderly fashion so you don't lose your work.

Surge Protection
In addition to battery backup, a UPS removes electrical surges from the power line from lightning and other causes. These spikes last millionths of a second but can damage sensitive electronic equipment such as computers. Your UPS may have separate sockets for surge protection. These sockets do not provide the advantage of battery backup, but will protect less-critical devices from power surges.

Battery Charger
During a power outage, the battery drains as the UPS uses its electricity. When the utility restores the power, the UPS automatically recharges the battery. If several outages take place within a short time, the UPS may exhaust the battery and shut down. But as long as power stays on for an extended period, the UPS will fully recharge the battery.

Connect LCD TV to Computer

type="html">


Flat-screen LCD televisions are designed to accept numerous inputs. Depending on the model of the LCD television, it may accept the older analog RCA video connections, analog component video, analog VGA, digital DVI and digital HDMI. Most LCD TVs accept multiple HDMI connections. Computers typically have analog VGA connectors, and quite often, they have digital DVI connectors. Increasingly, computers are coming equipped with digital HDMI connectors that carry video and sound over a single cable, which is perfect for connecting to an LCD TV.

1). Examine the back of your computer and determine which outputs are available. Choices in order of preference are HDMI, DVI and VGA.

2). Determine which inputs are available on the LCD TV.
3). Connect one end of the appropriate HDMI, DVI or VGA cable to the computer and connect the other end to the input on the LCD TV.

4). Connect a sound cable between the computer and the LCD TV, if any type of connection other than HDMI is being used. The computer side always requires a 3.5 mm headphone style plug. The LCD TV may also accept a 3.5 mm headphone plug or it may require RCA inputs for the audio. Either way, audio cables are available to suit your specific need.

5). Tune the LCD TV to the correct input. For example, if the second HDMI connection is being used, switch the TV to the HDMI-2 input.

6). Boot the computer and adjust the screen resolution appropriate for the TV. LCDs that support 720p have a screen resolution of 1280 x 720. LCDs that support full HD resolution use 1920 x 1080.

Turn Off MagicColor

type="html">


This feature collectively is known as "MagicTune," allow Samsung customers to optimize their monitors because Samsung monitors come with this feature. The "MagicZone" feature has settings that enhance the color and sharpness of multimedia content. "MagicColor" improves digital graphics by helping the monitor produce natural looking color. This feature has a demo mode. If enabled, the monitor demonstrates the feature by displaying before and after images showing how the screen looks with and without "MagicColor" enabled. You can turn the demo feature off by accessing the monitor's "Menu" panel.

1). Find the set of buttons on the monitor's front panel. These are in the bottom right corner of the panel.

2). Click the button labeled "Menu" to display the "Menu" screen. This menu contains several rows of items. Look for the "Magic" item. This item usually has the shape of a magic wand.
3). Press the "Up" and "Down" buttons on the front of the panel to move the on-screen cursor so that it highlights the "Magic" item. The "MagicColor Pro" screen appears.

4). Locate the button labeled "Source." This button functions like the "Enter" key on a computer. Press the "Source" button. This selects the "Magic" item.

5). Press the "Up" and "Down" buttons. As you press them, you will see the four MagicColor modes appear. These modes are "Demo," "Off," "Intelligent" and "Full." Press the buttons until you see the "Off" mode. Press the "Source" button to select that mode.

How to Unlock On Screen Display (OSD)

type="html">

 The On-Screen Display (OSD) on your ViewSonic VA912b computer monitor has a feature that allows you to lock it. This gives users the security they need when leaving the monitor unattended. When the screen is locked, nobody will be able to see the screen unless they have the passcode. You don't have to take your screen to a ViewSonic retailer to get the screen unlocked. You can do it yourself with little hassle.

1). Press down and hold the "1" button on the front panel of the ViewSonic monitor.

2). Press down and hold the "Up" button on the front panel of the monitor.

3). Hold both of these keys down for around 10 seconds until you see "OSD Unlocked" on the screen.

How to Write a Dual Layer DVD

type="html">


A dual layer DVD features two thin layers that can hold double the data, video clips or other media that you may store on a DVD disc. This saves time, space and allows you to have fewer discs for the same amount of space. Burning these discs is a relatively easy process that only requires a few extra steps than a standard DVD.

1). Download and purchase Nero (see link in References). Nero offers easy-to-use programs for every type of CD/DVD disc. Click the "Photo/Video" icon beneath the program's main menu. Nero Burning Rom will load and present you with a new project.

2). Look in the bottom right-hand corner of the project for a drop-down menu. The menu should say "DVD." Click the drop-down menu, and select "DVD-9." This is the technical name for a double-layered DVD.

3). Drag and drop your media files into the project. The program will automatically analyze them and show how much space they take up on the DVD. When the blue progress bar has turned red, the DVD is full and has too much content on it.
Click "Next" to proceed to the menu editing process. Create customized menus for the DVD including your own background, font and preview screens. Press "Next" when you have finished editing the menu.
Watch a preview of the DVD menu and press "Next" when you have tested all the functions. The final screen will come up with the burning options.
Insert the double-layered DVD disc and press the "Burn" icon to let the burning process begin.

DVD Data Disc
1). Click the "Data" icon in the main Nero menu. Click "Make a Data DVD." Wait for the menu to load within the program.

2). Click the drop-down menu in the lower corner and select "DVD-9" option. This option may appear in the left-hand corner for some versions of the Nero program. Press "Next" when you have made all the selections.
3). Insert a blank double layer DVD into your computer drive. Make sure it is a dual layer blank DVD because using a single layer could cause the DVD to have an error and be ruined.

4). Check your burn settings and press the "Burn" icon when everything is selected. Wait for the DVD to burn and complete. The disc will pop out of the drive when it is finished.

5). Insert the disc back into your drive and make sure that the DVD works. Wait for the files to load and click a few to make sure there were no errors.

Burn My Cassettes to CD?

type="html">

Many older listeners still have storage-boxes full of the magnetic tapes. If you have a collection of cassette tapes you would like to digitize and protect, you can import the audio into your PC. Both Windows Vista and Windows 7 include all of the software you need to record songs from your cassette tapes and store them as digital audio files on your computer.

1). Connect the audio cable to the "line out" port on the cassette deck or recorder. Connect the 3.5-mm end of the cable to the "Audio In" or "Line In" port on the computer. In many cases, the "Line In" port has a small blue ring around it that differentiates it from other audio ports on the computer.

2). Power on the cassette deck and insert the tape you want to record. Fast-forward or rewind the tape to the song you want to transfer the PC. Leave a second or two of silence before the music begins. Press the "Play" button and then immediately push the "Pause" button to stop play back.
3). Click the "Recording" tab in the "Sound" window. Click "Line In" and then "Set Default." Click "Properties" and the "Levels" tab. Use the mouse to adjust the volume slider and decrease or increase the recording volume. Click the "OK" button. Click "OK" again to close the "Sound" window.

4). Click "Start" and then "Control Panel." Once the main "Control Panel" window opens, click the "Sound" icon.

5). Click the "Start Recording" button in "Sound Recorder" and then immediately press the "Pause" button on the cassette deck to resume play back of the music. Allow the music to play on the deck while "Sound Recorder" records it in ".WMA" format on your PC. After the song finishes, click the "Stop Recording" button before the next song on the tape starts to play. Press the "Pause" button on the tape deck. Enter a file name for the audio track in the "Save As" window and click the "Save" button.

6). Record more songs from the cassette deck using "Sound Recorder." Save all of the audio tracks in the same folder as the first one.

7). Click "Start" and then "Computer." Navigate to the folder where you saved the recorded songs from the cassette deck. Open the folder and the press the "Ctrl" and "A" keys to highlight all of the files. Right-click on one of the highlighted files and click "Add to Windows Media Player list." Wait for Windows Media Player to launch and begin playing the first music file in the list, then click the "Stop" button on the player.

8). Click "Burn" at the top of the Windows Media Player window. Insert a blank CD into the optical drive of your PC when prompted and close the disc tray.

9). Click the "Start Burn" button to burn all the song files in the play list to the CD. Windows Media Player ejects the CD after it finished burning all the songs to the disc. The CD is now compatible with all CD players and media player applications.

How to Reset Getting Low Ink Messages for Refilling Dell Ink Cartridges

type="html">

Dell computer printers use a variety of types and sizes of ink cartridges. These cartridges are designed to be used once and then replaced. Refilling the cartridges is a more cost-effective alternative to buying new cartridges. Most Dell printers track usage of each cartridge to determine when the ink is getting low. Resetting the low ink warning prevents the printer from displaying low ink messages.

1). Click the Windows "Start" button. Select the "Programs" menu.

2). Click "Dell Printers." Click your Dell printer model within the Printers menu.

3). Click the "Maintain/Troubleshoot" tab. Select the "Ink Level" option. Click the "Advanced" button. Select the "More Options" option.
4). Click the radio button next to "Never display the printing status." If not present, click the radio button next to "Never display low ink messages."

5). Click the "OK" button to confirm the changes.

Clean the Rollers on a Phaser 6120

type="html">


The Xerox Phaser 6120 uses laser printing technology to transfer digital images and text to paper, creating hard copies. In order to create the printouts, the Phaser 6120 uses a series of rollers to move the paper through the inside of the machine. The toner powder, or the ink used in the Phaser 6120, as well as paper dust can eventually build up on the rollers with continued use of the printer. You may notice more paper jams or even black or grey streaks on the paper as a result. Cleaning the rollers takes a few moments of your time.

1). Unplug the printer's power cord from the back of the printer, remove any paper left in the printer's output tray and fold the tray's extension. Pull up on the handle located at the front of the Phaser 6120's top cover, swinging the cover open and toward the rear of the machine.

2). Grab the handle on the top of the toner cartridge and pull up until the cartridge comes free from the printer. Place the toner cartridge on a scrap piece of paper in an area without direct sunlight.

3). Wipe the feed rollers clean using a dry and clean microfiber cloth, making sure to turn the wheels so you clean the entire surface. Reinsert the toner cartridge in the same direction it sat inside the printer before, then lower the top cover so that it snaps closed.
4). Fold down the duplexer's cover on the backside of the printer, exposing the duplexer's rollers. Clean the rollers with a dry microfiber cloth, turning them as you did the feed rollers, then push the duplexer's cover back into place so that it clicks.

5). Grasp the notches located on the sides of the printer at the bottom of paper tray 1, then lift the printer up to separate it from paper tray 2. Place the printer on a sturdy and level table, far away from the edge.

6). Wipe down the rollers located inside paper tray 2 using a dry microfiber cloth, making sure to turn the wheels so you clean the entire wheel surface. Lower the printer back onto paper tray 2 carefully , lining up the edges of the printer with the edges of the tray. Plug the printer's power cord back into the back of the printer.

Replace Ink in Canon MP970

type="html">

The Canon PIXMA MP970 Photo-All-in-One printer uses seven liquid ink tanks to produce photos and paper printouts. The printer will display a message on its LCD screen when an ink tank runs out of ink. Low ink levels in one or more ink tanks will cause diminished print quality, such as streaks or lines in the printouts. Replacing depleted ink tanks will correct these problems.

1). Push lightly on the center of the printer's output tray to fold it down. Press the printer's "Power" button to turn on the printer before continuing.

2). Lift up on the printer's top cover until the hinges prevent you from raising it further. Wait for the ink tanks to stop moving inside the printer before proceeding.

3). Press on the tab in front of the ink tank you wish to replace, and lift the ink tank up and out of the printer. Dispose of the old ink tank, making sure to not touch the bottom of the tank to avoid getting ink on you.
4). Open the new ink tank's packaging and remove the tank. Peel off the orange tape and protective film covering the ink tank. Twist the orange cap on the bottom of the ink tank counterclockwise to remove it from the ink tank.

5). Slide the front edge of the ink tank into the empty slot in the printer. Press on the ink tank's sticker where it reads "Push" so that the tab on the front of the ink tank snaps in place, indicating that you have the ink tank secured properly in the printer.

6). Fold the top cover down and raise the output tray back into place.

Ways to Save Printer Ink

type="html">

When you purchase a printer for your computer, the price you pay for the device itself is only a fraction of the cost you incur over the life of the device. From time to time, you must replace your printer's ink cartridges. Lessen your ink consumption by developing wise printing habits.

Print Quality
Most printers have the option of printing documents and pictures at various quality levels -- and the lower the print quality, the less ink the printer uses. Except for "final draft" items you need to turn in to a supervisor or instructor at work or school, get into the habit of printing documents at low quality to save on ink.

Page Count
When you print a document, your computer will prompt you to enter the pages of the document you want to print. Look through your document before printing to verify that you need all its pages -- and if you don't, adjust the page range to reflect what you do need. If you print a receipt from a website, for example, the entire document may take up four pages, even though your receipt itself appears entirely within the second page.
Color vs. Black and White
On the whole, color cartridges are more expensive than black and white ones -- and, since color documents print using a combination of ink hues -- these cartridges run out faster with regular use. Even if a document appears in color on your screen, your computer gives you the option to print it in black and white. Unless printing in color is essential to the purpose for which you use your document.

Mobile Documents
With the advent of "smartphone" devices such as the Android, BlackBerry and iPhone, the necessity to print out certain documents at all has lessened. From receipts to emails to -- in some instances -- airline boarding passes, it's possible to pull up full-length documents using the email or Internet feature on your handheld device. This saves not only on ink, but also on paper.

Enable ATI Theater Mode

type="html">

ATI Theater Mode is especially useful if your personal computer contains video files that cannot be played on your DVD player. For example, you may have home movies on your personal computer and no way to watch them on your TV. Theater mode is an effective way to send videos to your TV with minimal hassle.

1). Right-click the desktop. A context menu will appear.

2). Select "Catalyst Control Center" from the context menu. Catalyst Control Center will load.

3). Select the "Graphics Settings" tab.
4). Click "Avivo Video" in the left-hand column. A sub-menu will then expand.

5). Click "Theater Mode" in the sub-menu. This will cause "Theater Mode" to be displayed in the main menu.

6). Select "in Theater Mode (full screen)" in the "Select Theater Mode Overlay" setting.

7). Select "Match the source video" in the "Theater Mode Settings" section.

8). Play your video, which will now be displayed on your television.

Diagnose a Graphics Card Problem

type="html">

Blank screens, display monitor flickering, squealing noises, incorrect text and monitor display sizes are all signs that require your graphics card settings to be adjusted. Thankfully, you can resolve many of these issues without having to dismantle your computer. By checking the connections and altering the refresh rate and resolution settings, your graphics card diagnosis will lead you to a fast and clearer visual repair.

1). Check the connections from the graphics card and video cable and verify that each one is securely attached if a blank or black screen is displayed. If your computer monitor does not work correctly, go to the next step.

2). Replace cables that have bent or damaged pins in the connector. If your computer monitor does not work correctly, go to the next step.

3). Change your display resolution if the text or monitor display size is incorrect. Click the "Start" button, click the "Control Panel" and then click "Adjust screen resolution" under "Appearance and Personalization."

4). Click the "Resolution" drop-down list and then move the slider to the "Recommended" resolution size for your monitor. Click "Apply." If your computer monitor does not work correctly, go to the next step.
5). Change your refresh rate if the display flickers. Click the "Start" button, click "Control Panel," and then click "Appearance and Personalization."

6). Click "Personalization," click "Display Settings," and then click "Advanced Settings."

7). Click the "Monitor" tab and then check the "Hide modes that this monitor cannot display" if it is not already checked.

8). Click the pull-down list under "Screen refresh rate" and select a new refresh rate. Click "Apply" within 15 seconds after your display illustrates the new changes otherwise the changes will not take affect. If your computer monitor does not work correctly, go to the next step.

9). Visit the graphics card manufacturer's website and update the driver for the graphics card.

Problems Installing GeForce 8400

type="html">


GeForce 8400 is a high-performance video card used for video games and multi-media applications. It features 512MB of video memory, full DirectX 10 support, SLI technology and dual DVI outputs. The GeForce 8400 is also compatible with Windows, Macintosh and Linux operating systems. However, when installing the GeForce 8400, like any video card, problems can occur with compatibility and other factors.

Motherboard Incompatibility
Video cards come with a few different slot types. This includes PCI, AGP and PCI-Express. The GeForce 8400 uses PCI-Express technology specifically. If your motherboard is outdated, or does not contain a PCI-Express slot, the GeForce 8400 will not work. So before purchasing a video card it is important to refer to your motherboard specifications to check for compatibility.

Output Problems
The GeForce 8400 features dual DVI outputs for monitor and TV connections. In order for a proper connection your TV or monitor it should also have a DVI input. However, if your monitor or TV does not have a DVI output, adapters can solve this problem. In most cases, the adapters you would need to solve this problem are either DVI to VGA or DVI to HDMI.

Outdated or Incorrect Drivers
Up-to-date drivers are necessary for the GeForce 8400 to run properly. If your drivers are out of date, or designated for an incorrect operating system the card will not function properly. In order to download the latest drivers for your operating system you will want to visit Nvidia's website. When downloading the drivers you will need to input your operating system and video card model.

Resolution Problems
Once the drivers are up-to-date, video settings may need to be adjusted. This includes resolution, aspect ratios and more. To adjust your settings accordingly, right click anywhere on your desktop and select "Personalize". Next, select "Display settings." Now make sure that your GeForce 8400 appears in your display settings. Finally, you can adjust your resolution and aspect ratio using the sliders on the display settings window.

VESA Specifications

type="html">


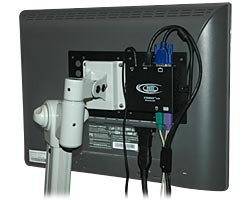
VESA, short for Video Electronics Standards Association, is an international organization founded in 1989 that established industry wide standards for uniformity in the video electronics market. VESA wall mounts have become especially important for mounting flat-panel plasma televisions and LCD monitors. The standards provide equipment manufacturers with specific guidelines of mounting-hole pattern placement and screw size in three different designs which are based on the monitor's weight and size of the screen.


VESA MIS-D
The VESA MIS-D is the standard design for small- and medium-sized flat panels, LCD monitors and screens. The design accommodates screens that range in size from 12 to 22.9 inches diagonally with a maximum weight of 30.8 pounds. The four-hole screw pattern ranges in size from 2.95-by-2.95 inches to 3.94-by-3.94 inches.

VESA MIS-E
The VESA MIS-E standard design is for larger LCD monitors, flat panels and screens with a maximum weight of up to 50 pounds. It can accommodate screen sizes between 23 and 30.9 inches diagonally and includes two six-hole screw patterns: 7.87-by-3.94 inches, and 7.87-by-7.87 inches.

VESA MIS-F
The VESA MIS-F standard design is for large LCD television monitors and plasma screens. Designed for displays that range from 31 to 90 inches diagonally, it can accommodate weights of up to 250 pounds. It includes three different hole patterns: 15.7-by-7.87 inches, 23.57-by-15.7 inches, and 31.4-by-15.7 inches.

What Is a VESA Wall Mount?

type="html">


VESA, the Video Electronics Standard Association, is an international body that sets standards for computer graphics. VESA standards also relate to display devices, and the safe and proper attachment, or mounting, of such devices.

Definition
A VESA wall mount, also referred to as FDMI, or Flat Display Mounting Interface, is a device that screws or otherwise attaches to a wall and supports display devices such as plasma televisions and other flat-panel monitors. Manufacturers that produce VESA wall mounts must meet certain variant standards to be VESA compliant.

Variants
The MIS-D, or original VESAmount, includes a panel that must contain four screws in a square arrangement. These screws require a vertical and horizontal distance between them of 100 mm. MIS-D screws use an M4 thread, or ridge that wraps around the screw to form a helix shape. M4 refers to a 4-mm diameter screw head. MIS-D screw holes are 10 mm deep; 10 mm fasteners are typically included with the VESA mount. Another VESA mount variant is the MIS-D 75, which has a 75-mm layout.

Identification
Manufacturers of VESA-compliant devices can display a label verifying that they meet the appropriate standards, called the "VESA mounting compliant" logo.

Monitors That are Compatible With Vesa Bracket Mounts

type="html">


A Vesa monitor mount is an option for hanging a monitor on a wall or on a swivel arm. These bracket mounts are configured with two standard hole patterns. On them, you will find a set of four screw holes with a horizontal and vertical measurement of 75 millimeters, or about 3 inches apart. A second set of holes for four screws measures 100 millimeters or about 4 inches apart.

HP LP2065 20-inch LCD Monitor
Hewlett-Packard's LP2065 20-inch LCD monitor has a removable stand and 100 millimeter holes for mounting. The video input supports digital signal inputs and DVI analog. This monitor includes two DVI-I to VGA and two DVI-Digital cables. It has a 2.0 USB hub that has one output to connect to the computer and four inputs for USB device connection. The viewing angle is 178/178 degrees. The video inputs are digital DVI-I, S-Video, analog RGB and composite video.

NEC MultiSync E222W 22-inch Wide-screen LCD Monitor
This monitor has ergonomic features making it flexible for daily use. The NEC MultiSync has Vesa mounts and a hand grip on the rear. This monitor features a 22-inch LCD display measuring 20 inches by 8.4 inches by 15.2 inches. It weighs 15 pounds. It also has a swivel that may be adjusted for tilt and height. It has an image aspect ratio of 16:10. The image brightness is 300 cd/m2 and an image contrast ratio of 1,000:1. The signal output is VGA and DVI-D and the monitor is certified for use with Windows Vista.

EIZO ColorEdge CG223W-BK 22-inch Wide-screen LCD Monitor
The Eizo ColorEdge has a FlexStand that will allow you to swivel, tilt and rotate the monitor by 90 degrees to provide a portrait view. You also can mount the monitor onto a Vesa bracket. This monitor features a USB hub. Its dimensions are 20.1 inches by 10.1 inches by 20.6 inches. It weighs 21.2 pounds. Its aspect ratio is 16:10 and it has an image contrast ratio of 950:1. The signal input is DVI-I, and it comes with Display-Port.